
AWS SNS is a service that allows you to send a notification in two ways. The first (A2A) provides high-throughput, push-based many-to-many communication between distributed systems, microservices and serverless applications, including Amazon Simple Queue Service (Amazon SQS), Amazon Kinesis Data Firehose, AWS Lambda and other HTTPS endpoints. The second way (A2P) is to send messages to customers via SMS, push notifications and email.
At the very beginning, you should consider how to configure the service monitoring system to send notifications via SNS. Since the amount of information is quite long, I will break it into 2 parts. From this article, you will learn how to prepare the SNS service and configure the access policy and user in IAM. In the second part, I will configure a server with Icinga2 and run a working service on it.
Amazon SNS (Specifically, Amazon Simple Notification Service) is used to send both HTTP/s and SMS or email notifications. It is worth mentioning that messages can be sent not only from services Amazon Web Services, but also from other services such as the Icinga 2 monitoring system. I will use a simple example for the Icinga 2 system, of which I am a silent admirer, and in addition, at Qlos we actively work on it.
I will use the SNS service to send SMS messages from the Icinga 2 monitoring system. The principle is that if one of the servers is unavailable, the monitoring system will detect the situation and send messages via the SNS service. The important thing before enabling SNS service is to check the payment price list, which is available at AWS . Despite the billing plan, it is possible to use the AWS Free Tier, which allows you to send 1,000 emails and 100 SMS messages for free. This is ideal for any company looking to test different messaging applications. Therefore, whether you are in the e commerce or manufacturing industry check out Amazon SNS for free before making your final choice.
Let’s start by preparing the Amazon environment in the graphical Management Consol.
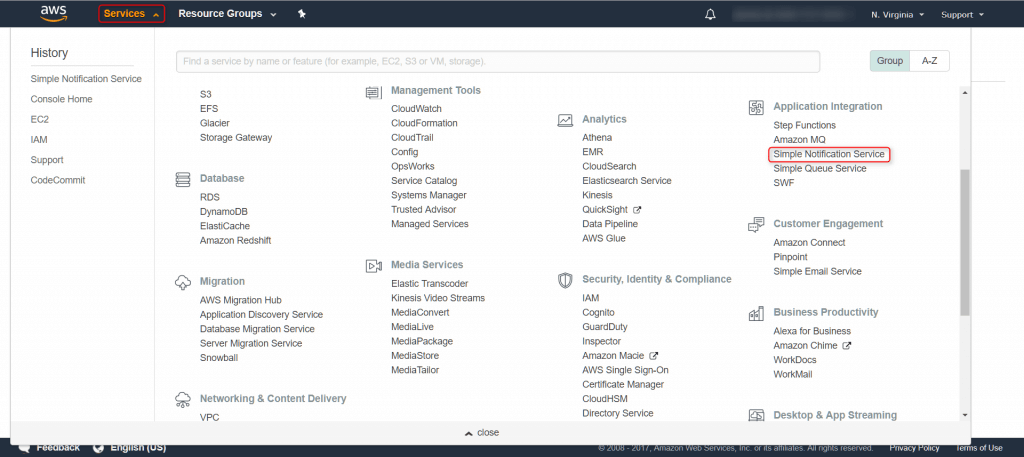
We log into the AWS environment and look for the “Amazon Simple Notification Service” (Figure 1) and go to the first option “Create Topic” (Figure 2).
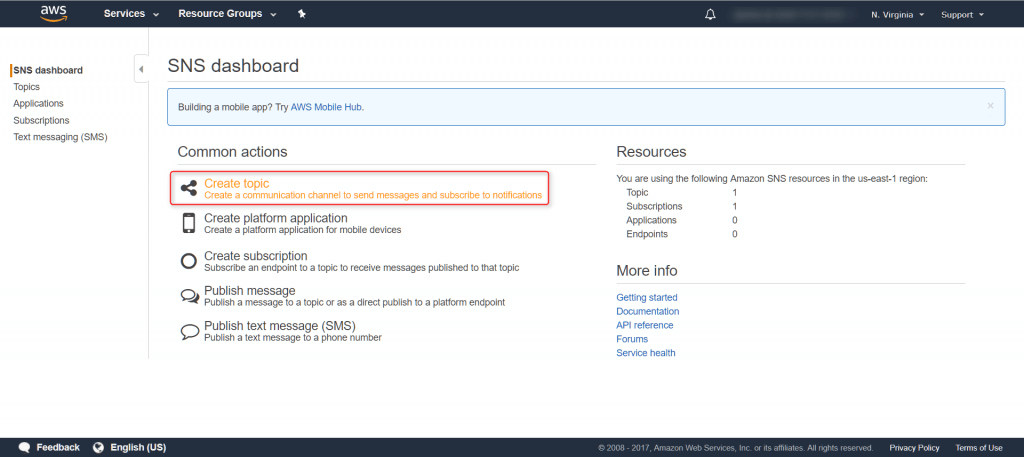
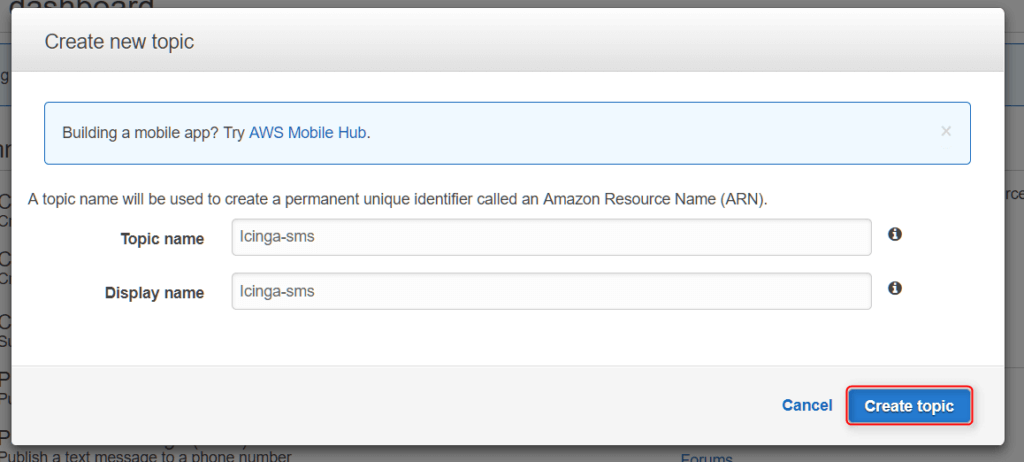
After clicking “Create Topic,” a window titled “Create new topic” will pop up (Fig. 3), where you enter “Topic name” and “Display name.”
NOTE! Topic name has a limitation of 256 characters, and it is not possible to change the name later. In the case of Display name, the limit is only 10 characters. However, we can modify its name at any time.
After clicking “Create topic”, we will go to the summary, which will include the “Topic ARN” (Fig. 4). Topic ARN function is needed to configure security policy for users with permission to send notifications, in addition, it serves as SNS topic identifier.
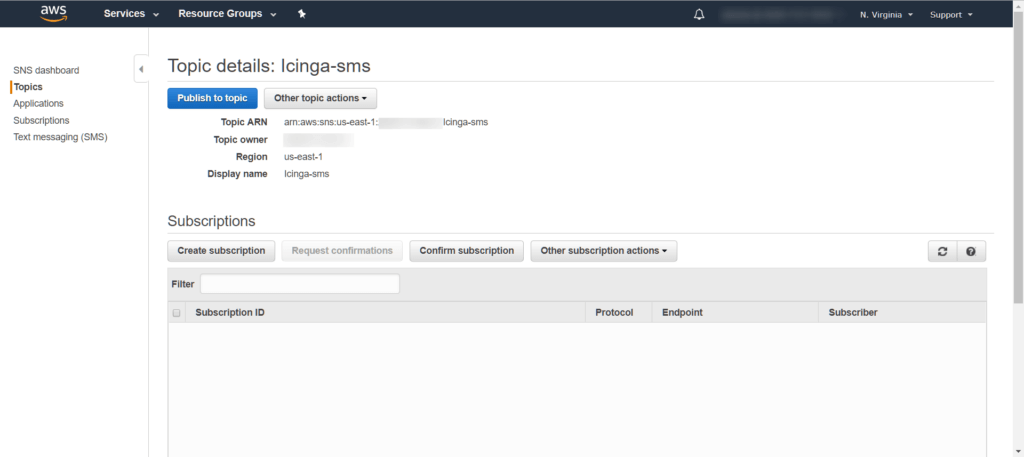
The next step is to create a subscription using the “Create subscription” option visible in the “topic” details. Going through this option allows you to not have to copy Topic ARN. Another option is to go to “Subscriptions,” located on the left side, where you should create a subscription. But then copying Topic ARN is a must.
My advice is to copy the Topic ARN ID and set it aside. It is best to save it in a safe place that only authorized persons will have access to. It will be needed when creating an access policy for this resource.
This is adding a contact in the form of a phone number. There we will receive all monitoring notifications in the form of SMS.
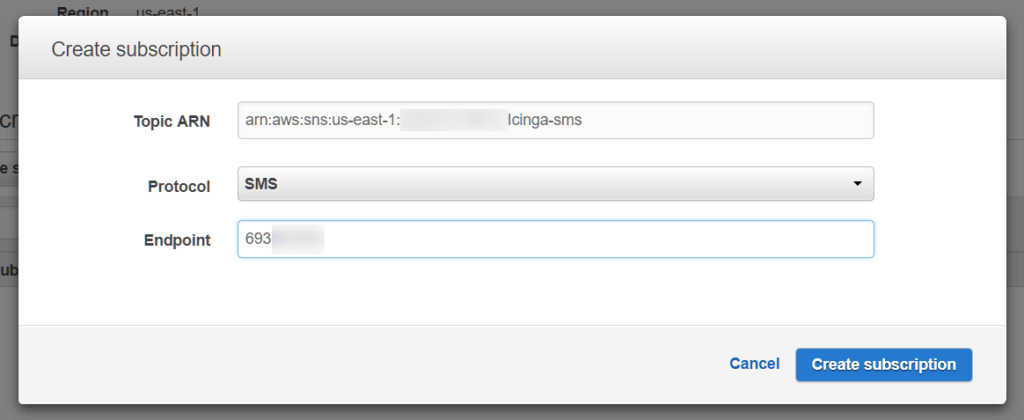
After clicking “Create subscription”, we will be shown a new window asking us to select a protocol (Fig. 5). In this case it will be SMS, but it could also be a completely different protocol. The protocol is understood here as the communication channel by which the notification is to be sent. This includes. SMS, e-mail, accessing some site over http/s, and executing any AWS Lambda function. Check your cell phone and review all the possibilities. As for the “Endpoint” field, here you need to enter the phone number where you want the SMS to be sent.
After creating a subscription, let’s go to the details of the given “topic”, where you can see the added subscription with the contact number visible (Fig. 6).
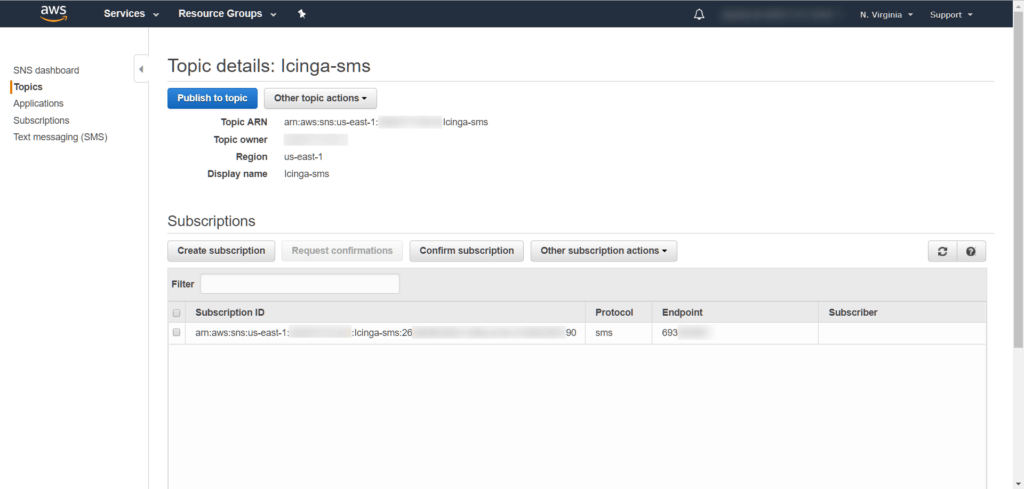
We have completed the first stage of configuring the Amazon SNS service, which is completely sufficient for our basic use of the monitoring system.
In case you do not have a limited access IAM user with the ability to send notifications, check the instructions below.
To begin with, you should create an access policy that should be assigned to a new user. Creating an access policy is essential if you want to maintain a high level of security and restrict the ability of a selected user to use the service.
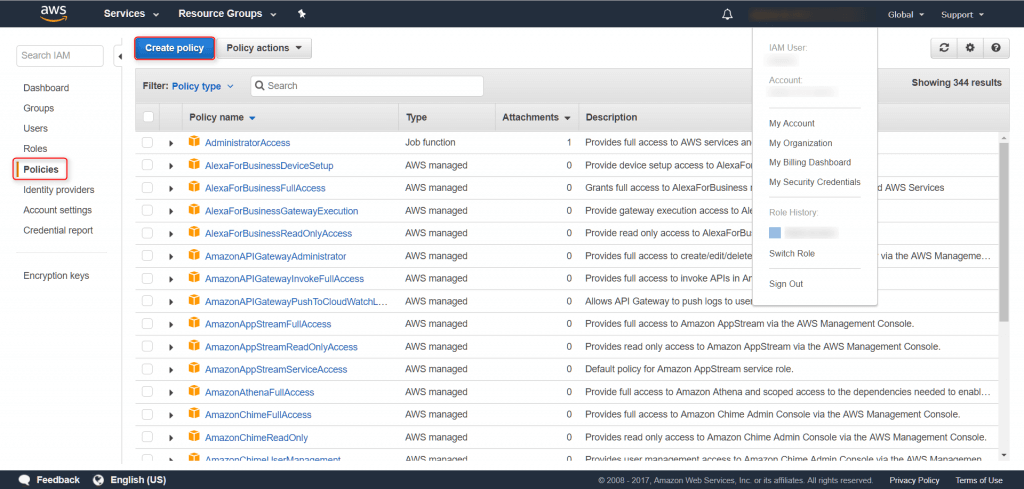
Go to “My Security Credentials,” then to “Policies.”
Click “Create Policy” to create a new security policy (Figure 7).
A visual editor will appear, which makes it easy to add access to specific resources by modifying the “Actions” field. In the image below, you will see the policy for Simple Notification Service with the selected write action “Publish” for the previously created “Topic” in the SNS service (Fig. 8).

The next view (Figure 9) shows the same policy in JSON code.
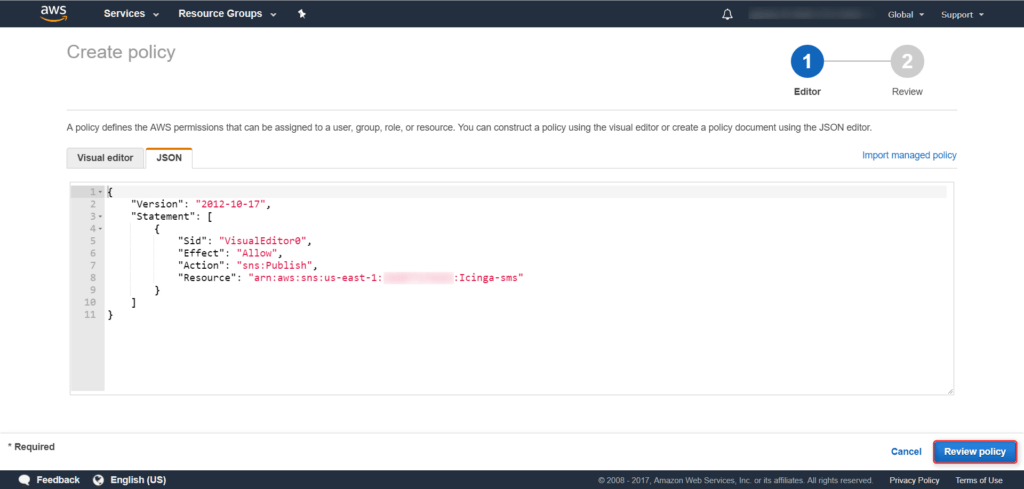
We click “Review policy” and go to the next step, where we have the opportunity to enter the name of the policy and its description. This will make it easier for us to identify the data. (Figure 10).
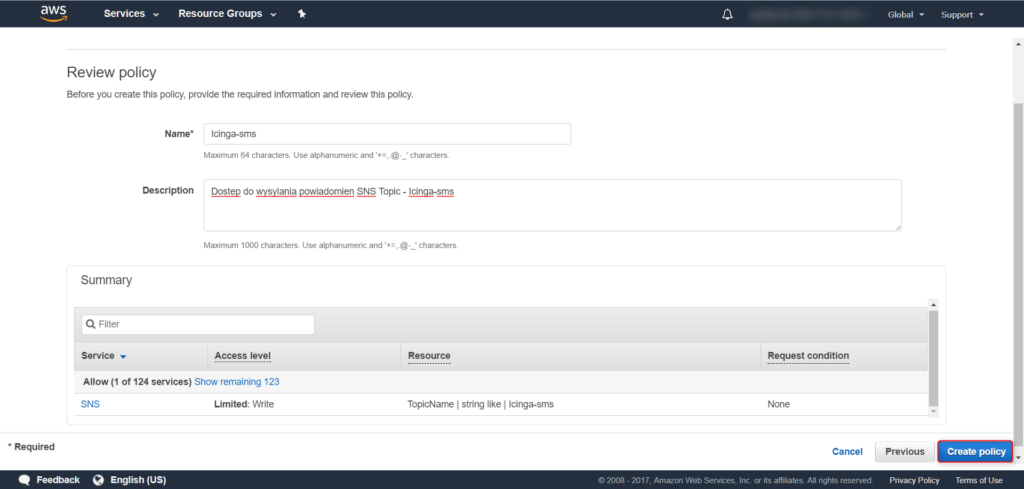
Fig. 10
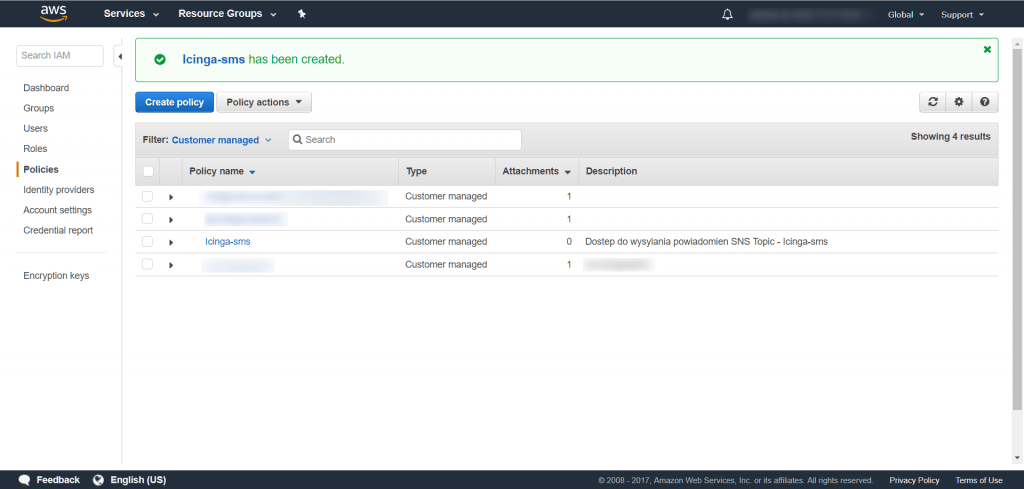
When you click “Create policy”, you create your own policy, which will be shown in the list along with the other instructions. You can limit them so that you find only your policies. Use the available filters and the “Customer managed” function for this, after which only the policies we created will be displayed (Fig. 11).
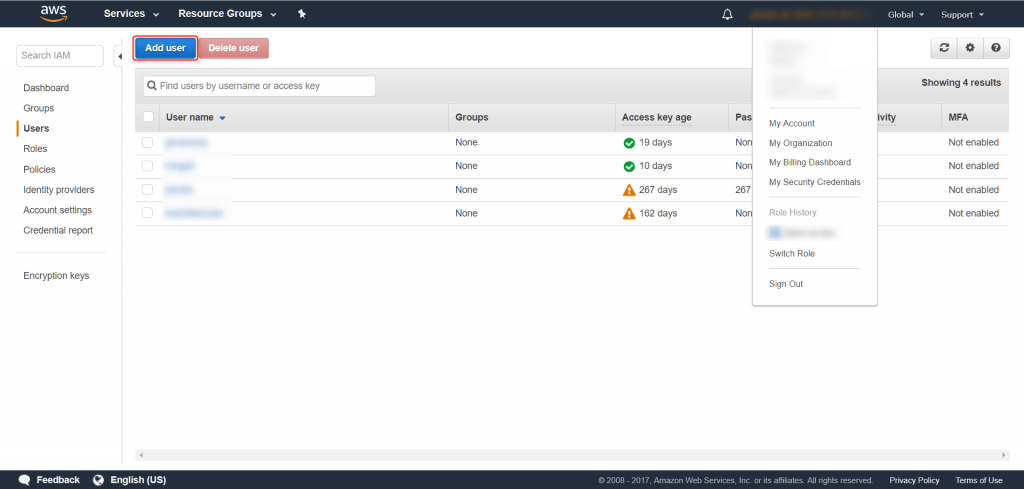
If you are logged into the AWS console, you should go through the given credentials: “My Security Credentials” -> “Users” -> “Add user” (Figure 12).
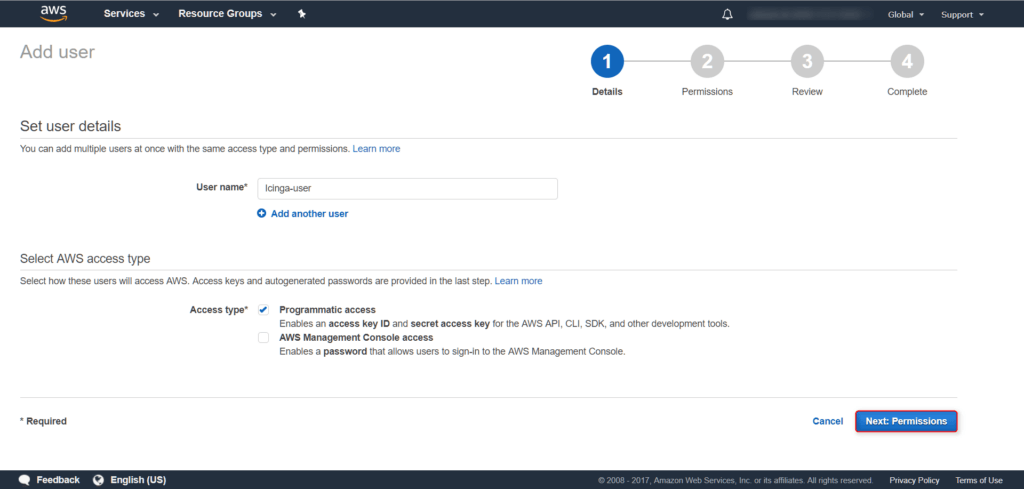
The first step is to enter a user name, then select “Programmatic Access” (Fig. 13). Thus, the added person will have access to the AWS API and will be assigned an Access key and Secret access key, used to authenticate the user.
Click “Next Permissions” and add the previously created security policy. Remember to choose a good document. (Figure 14).

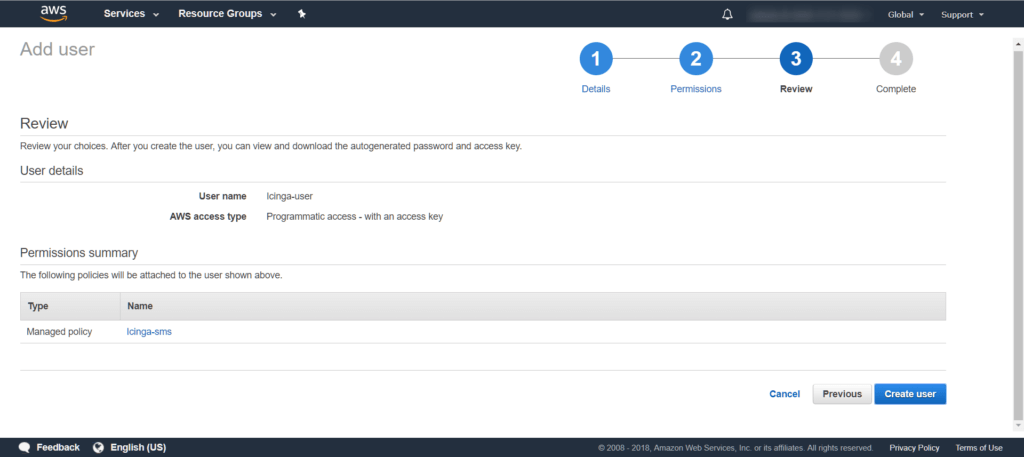
Click “Next Review”, verify that the username matches and click “Create user” (Fig. 15).
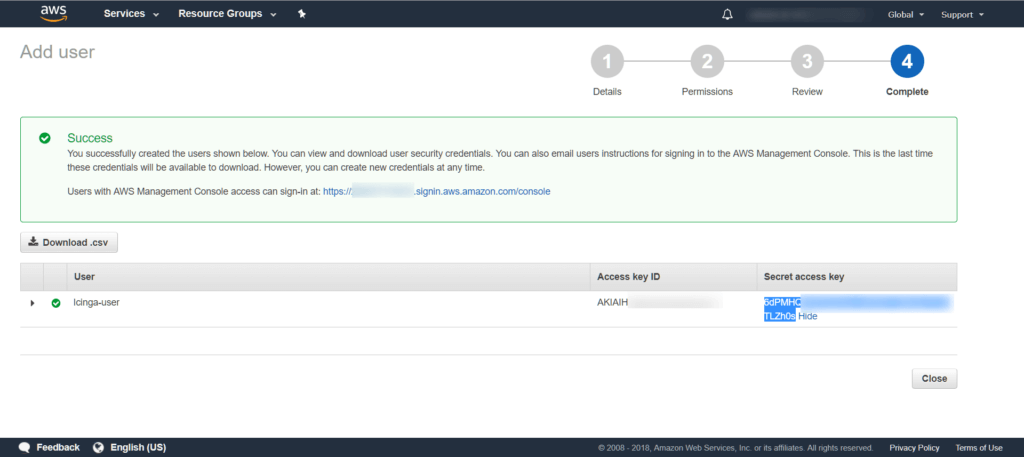
After clicking the “Create User” option, we will see the “Access Key ID” and “Secret access key” assigned to the user, which will be used when configuring the server with the Icinga 2 system (Fig. 16).
In addition, I am still posting the security policy I used in the tutorial. It restricts access for the designated user.
{
 "Version": "2012-10-17",
 "Statement": [
 {
 "Sid": "VisualEditor0",
 "Effect": "Allow",
 "Action": "sns:Publish",
 "Resource": "arn:aws:sns:us-east-1:ACOUNT_ID:Icingaweb2"
 }
 ]
}
In the next part, I will describe how to configure a server with Icinga2 and run a working service on it. SNS service is a lot of possibilities, check for yourself in the next section.