
 Piotr Kmita

Ansible is a tool used to automate administrative processes, orchestration and configuration management. It is agentless, which means that no agent needs to be installed on client servers and they are not unnecessarily burdened by it. With its help, we can deploy hundreds of servers in a short period of time with software installed and configured to be fully defined by us. It can be a configured hosting server with cPanel or DirectAdmin, or even a single service installed on thousands of servers. The limitation in the use of this tool is only our imagination and the time we have to prepare the configuration of Ansible itself.
We can manage both Linux and Windows systems. In addition, it is possible to use it in network devices, making it much easier to change a piece of configuration in switches.
We can use Ansible in two ways. The first is to issue ad-hoc commands directly from the console for individual servers from a predefined inventory. We can also use a playbook in which all the events to be executed are included. We mainly use Playbook when we want to deploy some configuration or install some services.
When we want to execute the same command on several servers, we will use the ad-hoc command directly for this. Below I demonstrate one of the simpler commands and a short playbook contained in a single file.
[email protected] ~ # ansible localhost -m shell -a "hostname"
localhost | SUCCESS | rc=0 >>

ansible-host.kylos.net.plInstalacja httpd - playbook
---
- hosts: localhost
tasks:
- name: Install httpd
yum: name=httpd state=latestWynik z uruchomienia playbooka
[[email protected] tmp]# ansible-playbook playbook.yml
PLAY [localhost] ****************************************************************************************************************************************************************************
TASK [Gathering Facts] **********************************************************************************************************************************************************************
ok: [localhost]
TASK [Install httpd] ************************************************************************************************************************************************************************
changed: [localhost]
PLAY RECAP **********************************************************************************************************************************************************************************
localhost : ok=2 changed=1 unreachable=0 failed=0Above I demonstrated only installations on a single host (specifically localhost). Later in this article I will show the use of Ansible using AWS servers. We can install on all defined hosts in our inventory, which can be static or dynamic to search for all instances in AWS EC2, for example. The static inventory by default is located in the /etc/ansible/hosts file.
For example, it might look like this:
Inventory
[grupa-serwerow]
serwer1.kylos.pl
serwer2.kylos.pl ansible_port=2222 ansible_user=kylos

[www]
www[001:006].kylos.pl
If the connection to the servers is made with the ssh key and we have root privileges, then we do not need to configure anything. If, on the other hand, we want to use a different user than the one we are currently using and an ssh port, we can use the parameters in inventory as for server2.kylos.pl.
Ansible-Galaxy is a public library of Ansibel roles written by the community. Its resources are generally available and can be used for a wide variety of administrative tasks. Unfortunately, in most cases, the roles included in it have a supporting function. Practice shows that the implementation of a comprehensive solution requires many modifications in them to meet all our expectations.
The library is located at https://galaxy.ansible.com/. If we use the search engine located at this link and type the word “apache”, it is likely that the following role may appear to us first in the search results:
https://galaxy.ansible.com/geerlingguy/apache
Using her example, we will demonstrate the installation of an Apache-based web server later in the article.
Installation or download of such a role can be done by issuing the following command:
ansible-galaxy install geerlingguy.apache
You can also find this and other commands directly in the documentation of the role in the library.
In this part, he will use 3 servers running on AWS with Amazon Linux installed. On two of these servers we will install a web server, and on the third we will not include any changes
First we download the roles (unless we have done it before) geerlingguy.apache:
ansible-galaxy install geerlingguy.apache
# ansible-galaxy install geerlingguy.apache
- downloading role 'apache', owned by geerlingguy
- downloading role from https://github.com/geerlingguy/ansible-role-apache/archive/3.0.0.tar.gz
- extracting geerlingguy.apache to /root/.ansible/roles/geerlingguy.apache
- geerlingguy.apache (3.0.0) was installed successfull
Here we will use the predefined inventory and configured Ansibl so that it logs in directly after the key to the instances after the ec2-user and grants root user privileges.
For this in the ansible.cfg configuration I used:
[privilege_escalation]
become=True
become_method=sudo
Our inventory now looks like the following:
ansible_inventory

[all]
ansible00 ansible_host=54.211.109.9 ansible_user=ec2-user
ansible01 ansible_host=18.208.169.62 ansible_user=ec2-user
ansible02 ansible_host=35.170.202.224 ansible_user=ec2-user
Our playbook looks like this:
ansible-playbook.yml
---
- hosts: all
  roles:
   - role: geerlingguy.apache
     when: ( inventory_hostname == "ansible00" ) or ( inventory_hostname == "ansible01" )
  tasks:
   - name: Verify hosts with apache
     service: name=httpd state=running
     ignore_errors: yes
Now we can proceed to launch the playbook by issuing the command:
ansible-playbook -i ansible_inventory ansible-playbook.yml
Below is a screenshot of the latest information visible on the screen:
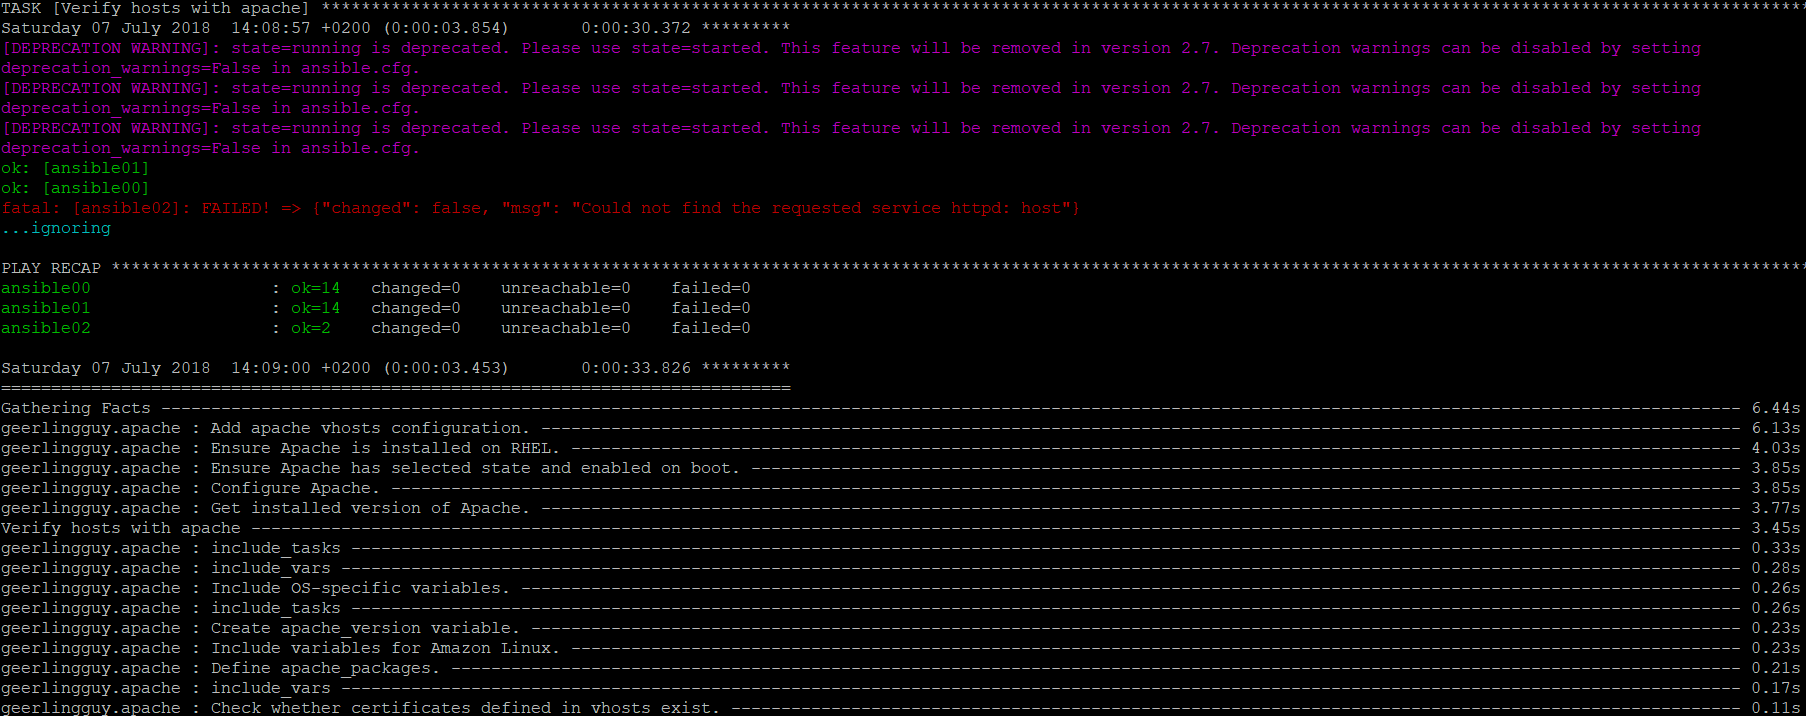
The article includes only partial background information to help you get started with this tool. By default, at the end of the execution of the playbook you will not get information with the time of completion of each task. For this it uses the so-called. “callback_whitelist” with parameter “profile_tasks”. It greatly simplifies the ability to optimize individual tasks which is useful for large projects.